Nokia XL USB Driver4 min read
How to Install the Nokia XL USB Driver on Windows:
If you’re wondering how to install the Nokia XL USB Driver on Windows, then this article is for you. You’ll learn how to install the driver and root your Nokia XL.
In addition, you’ll learn how to manage the device. The first step is to make sure you have the correct device manager.
Download Nokia XL USB Driver (Here)
Installing the Nokia XL USB Driver:
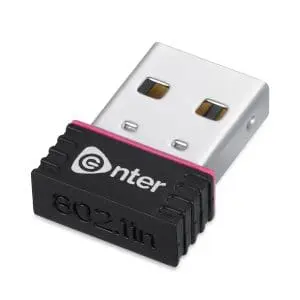
The Nokia XL USB Driver is a one-click software application for Windows machines that enables your Nokia phone to connect to a PC. It allows you to transfer files and perform functions such as data backup and restore.
You can also use the driver to install stock firmware on your device. The drivers can be downloaded from anywhere. Once you install the drivers, you can connect your phone to your computer using a USB data cable.
The Nokia USB Driver is compatible with all versions of Windows, including 64-bit versions. You can download it from the links provided below.
After downloading the Nokia USB Driver, install it by following the simple steps that are detailed below. Once the driver has been installed, close the “Add Hardware” wizard.
To connect your Nokia phone to a computer, connect it to a USB cable. It will automatically show as a CD-ROM drive when you connect the device.
You can also install Nokia USB Drivers from the M and F driver packages, which offer advanced recovery options. These packages also contain emergency flash drivers from MediaTek and Qualcomm.
Once the Nokia XL USB Driver has been downloaded, you can run it in Device Manager to install it. After running the program, you can connect your Nokia XL to your computer.
Rooting the Nokia XL:
There are a number of methods for rooting the Nokia XL. You can use the Linux OS or use “Magisk”, which will root the system partition on a windows PC.
But you should be aware that not all windows PCs are compatible with the rooting procedure. To begin the process, you need to enable USB debugging and unlock the bootloader.
First, download the Nokia X Toolkit from the first post. After that, connect the Nokia XL to your PC using a USB cable. Make sure your device is fully charged before you start this process.
You can also enable USB debugging on your phone before you start. Then, open the Nokia X Toolkit and right-click to run it as an administrator.
Rooting the Nokia XL USB Driver can enable you to access more applications and different ways to use your device.
Once the rooting process is complete, you can now install the new operating system on your device. Moreover, you can test various Android applications on your PC using the Android SDK, a downloadable tool.
Once your phone is rooted, you’ll have full access to all of its files. This will increase its performance, and battery life, and allow you to install custom software.
In addition, you’ll be able to use Xposed Framework and other modules. There are a number of rooting tools for Nokia XL smartphones, including Magisk.
Managing the Nokia XL USB Driver:
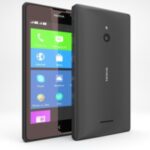
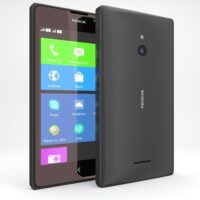
The Nokia XL is an Android smartphone that offers a number of benefits. It comes with Wi-Fi and Bluetooth connectivity and supports data transfer via USB Mass Storage mode.
However, the operating system places a limitation on the amount of memory a phone can use. It only supports up to 1.29 GB of storage capacity.
Once installed, the Nokia XL USB Driver will allow the device to connect to your Windows computer. It also comes with ADB and Fastboot drivers for additional functions.
These drivers will help your device detect and transfer data between it and the PC. You can download and install the latest versions of the driver from the manufacturer’s website.
In case you have an existing driver package, you can install it without any additional hassle. Once the driver is installed, you can use it to transfer data from your phone to your computer.
If the driver is not installed, you can install it manually using the Device Manager. This way, you don’t have to wait for your phone to detect it and connect.
The next step is to create a system dump. This will save a copy of the current ROM to your PC. This will allow you to recover your device in case of a malfunction. It’s also recommended to perform a system dump before installing custom ROMs or Android updates. To perform the system dump, you will need a windows pc and an EasyJTAG Plus box.
Warning: Array to string conversion in /srv/users/rasheed/apps/allmobitools/public/wp-content/plugins/neori-social-share-buttons/neori-social-share-buttons.php on line 37
Array